
How to Draw…and How to Shortcut it
Jun 05, 2024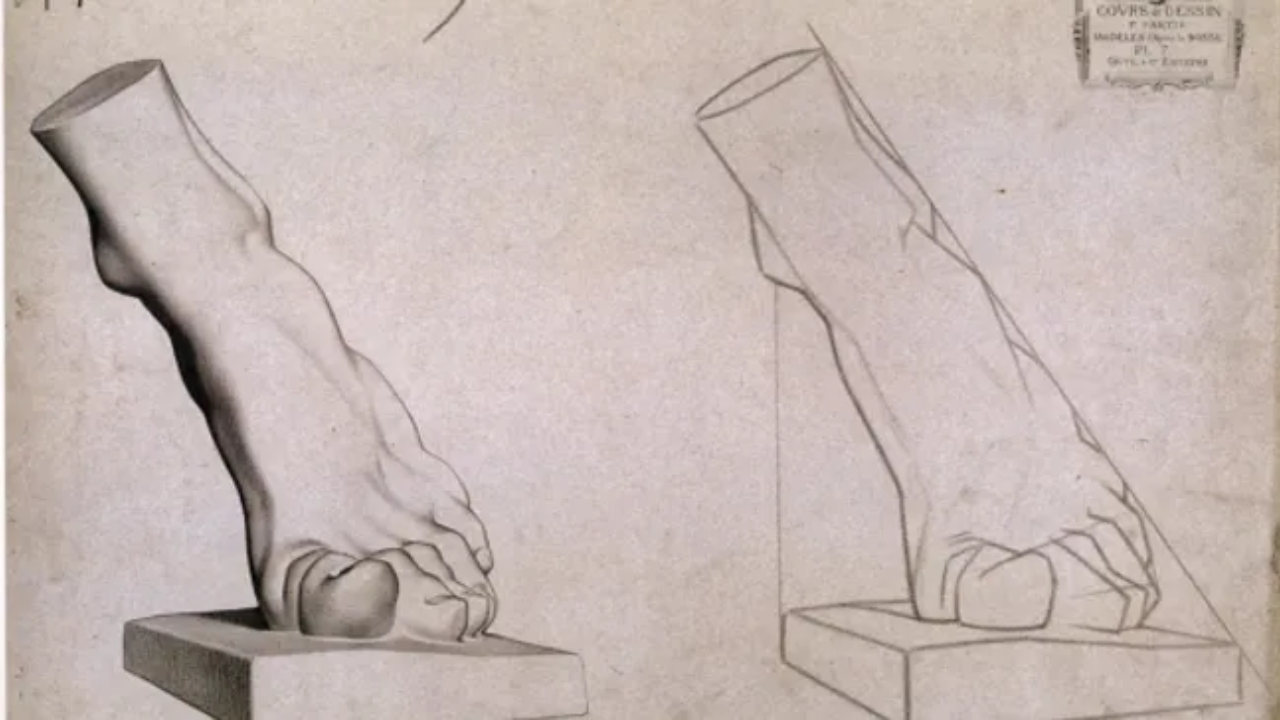
I often get asked the question: how do you draw? It isn’t the easiest question to answer: there is no straight response to it. I think the truest answer is that you practice, it isn’t what you might want to hear but I think it’s the truth. However, there are good methods for practising and there are bad, I’m here to share a few of the good ones and some ways to shortcut the whole process!
Classically, the artist learnt to draw using something called the ‘sight-size’ method which involves painstakingly measuring your subject and transferring these measurements to your paper. This is why you see us artist making odd faces and squinting at pencils held in front of our subjects: we are measuring using a pencil.
A major issue with this method, it that it can take quite a while to perfect and is generally slow. You also need to make sure you’re standing in the exact same spot to take your measurements from and then transfer them to your paper. If not, your proportions will be completely off!
A progression from this method, is to the ‘Charles Bargue Drawing Plates’. These are a series of etches, produced by Charles Bargue funnily enough, which become progressively more complex and again are intended to be copied, mark for mark in the exact same proportions and to the same scale. The benefits of the Bargue Plates, are that they train your eye to more accurately see angles and how they join together to eventually create a form.
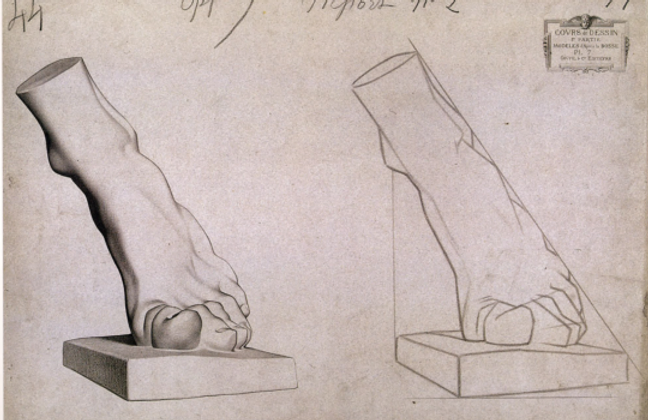
You can see below with the foot example, that the foot is firstly mapped out with long straight lines and the whole foot is placed using more straight lines. It takes time to begin to see your subject in this way but there is no denying it is a useful exercise to train your eye and hand.
As you may imagine, both of these methods takes considerable time to learn and then to become accomplished at, but, they are great places to start if you’re serious about the art of drawing. However, if you have better things to do and want to skip ahead to the fun part, where the colours come out, keep on reading…
There is one more method, which you may have heard of, that is a cross over between drawing and tracing. It is the grid method. This method is fairly slow and methodical but really suits some people and will certainly help to train your eye, as the Bargue method does. Unsurprisingly, you need to grid your reference photo, (you can do this with an app, or print it out and draw a grid over it with a ruler), you then need to grid your paper/canvas up in the same ratio as your grid on the reference and then copy the photo square by square. Personally, I don’t like this method much and prefer to start out with larger gestural marks, (similar to the straight lines surrounding the foot sketch above), that become more precise in their alignment, working from the biggest shapes down to the smaller.
If you haven’t been taken with a single one of those methods, then you can always trace. Now, before you worry that this is ‘cheating’, remember this has been done throughout art for hundreds of years. In fact, the Dutch masters of the golden age were some of its biggest fans and nobody would call their work ‘cheating’.
You’ll need some tracing paper, or use some greaseproof paper, then tape your reference photo down and the tracing paper on top to make sure you don’t move it and end up with a wonky drawing. You could also print out your reference photo and transfer the outline onto your paper using the method which I will show you below. That’s a good option is you haven’t got any tracing paper.
So there you are, fret not, you could draw from scratch, you could use a grid, or, you just forget the whole process and trace it if you’d prefer. I must say for kids especially, giving them a helping hand with the outline can really help them later on. So now, I am going to show you how you can transfer your drawing onto pastel mat to begin the fun part. I would advise that you do this, even if you are a super confident drawer, as you can’t easily rub out marks on the pastel mat and it can result in a lot of waste – trust me!
Transferring Your Drawing
So now that you have your drawing, using whichever method best works for you, you need to transfer this to your pastelmat. You may think: why can’t I just draw directly onto the mat? Well, unfortunately, marks do not easily rub out of the pastel paper and so every line you lay down needs to be perfect! Hence, I do my drawing first, then I transfer it to my pastelmat so that I know it is accurate and ready to render.
I have done a video to better show how to transfer your drawing, to do this you’ll need:
- A drawing/image on lightweight paper (80gsm, which is normal copy paper, or lower).
- Pastel chalk or pastel pencil
- Biro
- Tape to hold your drawing down, if you want
I hope you’ve enjoyed this blog post and that you are now a little clearer on how to start a drawing and how to get it from your paper to your pastelmat. The next post will be in two weeks time and will be a detailed step by step art class in how to render the Peacock I have just transferred in the video. So, if you want to get ahead, find yourself a Peacock reference photo with a similar pose to mine and you can be ready to get cracking with the next class!
Stuck for where to begin?
Start with 4 free project outlines, ready to begin in pastel pencils straight away!
Keep your pastel pencil knowledge up to date!
Stay inspired and keep your pencil moving with inspiration and updates.
Don't worry, your information will not be shared.
We hate SPAM. We will never sell your information, for any reason.
