
Learn to Draw a Magnolia Flower in Pastels
Jun 05, 2024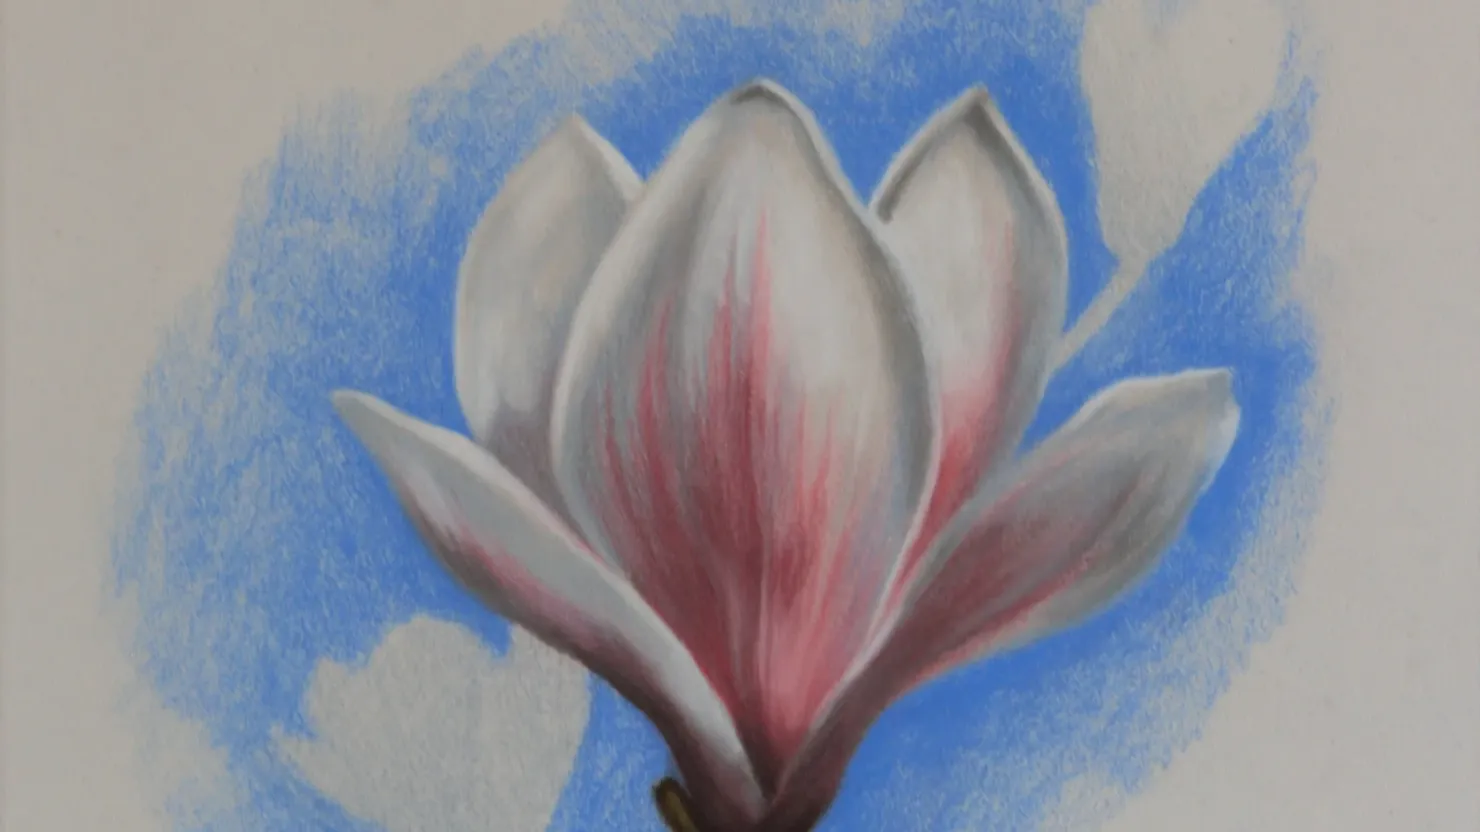
It’s been a few weeks since I last posted something for you lovely people to get stuck into, and a good kitchen table project is perfect for lock-down, so here we are again with a new one. I’m certainly using my weekends to pick up all of those half-forgotten crafts I’ve started over the years with good intentions, only to abandon moments later … as it turns out, I should have enough projects to keep me going for several months!
We have been having some glorious weather during this lock-down and a Magnolia tree on the farm came into bloom in all of its glory a few weeks ago. Unfortunately, I didn’t get good photos whilst it was out, I was too busy drawing lambs (see here), however, I have since thought what a great little project it would make for you all. It’s a brilliant one to learn from as it’s relatively simple and you can apply this tutorial to any photo of a magnolia flower, create a whole tree even! You could also use these pencils to render entirely magenta coloured petals or take the pinks out and go white, have a play around.
I haven’t provided a set image to work from for this tutorial as you can use these steps for almost any reference. I sourced mine online from some of the royalty-free sites which artists are welcome to use such as Pixabay and Unsplash, so if you’d like a free one try there.
Once again, I am teaming up with Paper Story who are my pastel pencil suppliers in Norfolk and they are carrying on with orders throughout this challenging time. Angie has just topped up her pastel supplies for us and is once again offering 30% off your order on the pencils needed for this tutorial which is amazing!
So, if you’re ready to go, let’s begin!
Materials for the Project
A quick note, I am not sponsored by any of the manufacturers in this post, these are the materials I normally use, feel free to swap and substitute as you like!
30% off the pencils required with Paper Story:
Faber Castel Pitt Pastel – 273 Warm Grey IV
Faber Castel Pitt Pastel – 193 Burnt Carmine
Faber Castel Pitt Pastel – 124 Rose Carmine
Faber Castel Pitt Pastel – 270 Warm Grey I
Faber Castel Pitt Pastel – 140 Light Ultramarine
Faber Castel Pitt Pastel – 101 White
Faber Castel Pitt Pastel – 170 May Green
Faber Castel Pitt Pastel – 177 Walnut Brown
Stabilo Pastel Pencil – 722 Cold Grey
Light Grey Clairefontaine Pastelmat Sheet
To find the individual pastel sheets, click here. Alternatively, ‘light grey’ is included in some of the pastelmat pads, if you bought the selection for the previous Dog’s Eye tutorial, you will already have light grey in that mix.
Clairefontaine Crystal Paper
This is included in the pads of pastelmat paper, however, if you are buying individual sheets of pastelmat, click here to order the crystal paper.
Faber Castel Putty Rubber
This is a lovely project as there are only 9 pencils needed for it, significantly less than the previous project. I am once again using the pastelmat sheet (paper), rather than the board for this. For my workshops in Norfolk and Oxfordshire, which I hold once a month, we use pastel board as I do find you achieve better results. However, to keep costs down, I’m using the sheets which come in books so that you will get a selection to choose from making it a good way to experiment and practice.
I then also use a putty rubber for any cleaning up and the crystal paper is wonderful as it stops you smudging your work whilst you’re drawing and protects it before framing. The crystal paper comes ready in the pastelmat books which is handy and makes them a doubly good option for practising.
Step 1 – Sharpen Pencils and Transfer Image
Before you start, sharpen your pencils so that you’re ready to get going, a tutorial for how I sharpen mine can be found here.
I have begun by transferring my sketch (see below) to the pastelmat, I’ll be releasing a tutorial on this as a few people have asked how to do it, however, briefly here’s how it can be done:
Start with an image you want to transfer, this could be a sketch, (you could print out and use mine if you’d like), a trace or a printed photo. Then, take a pastel pencil of contrasting colour to your pastelmat sheet and colour the reverse of your image in.
You should now have the image/sketch on one side and a big mess of pastel shading on the back.
Place your image, right side up, on the pastelmat and hold it in place. Then, simply draw over your image with a pencil or biro thus transferring the pastel on the reverse side onto your pastelmat sheet.
When you lift the image off, you should have a perfect line drawing left, much like carbon copy paper does.
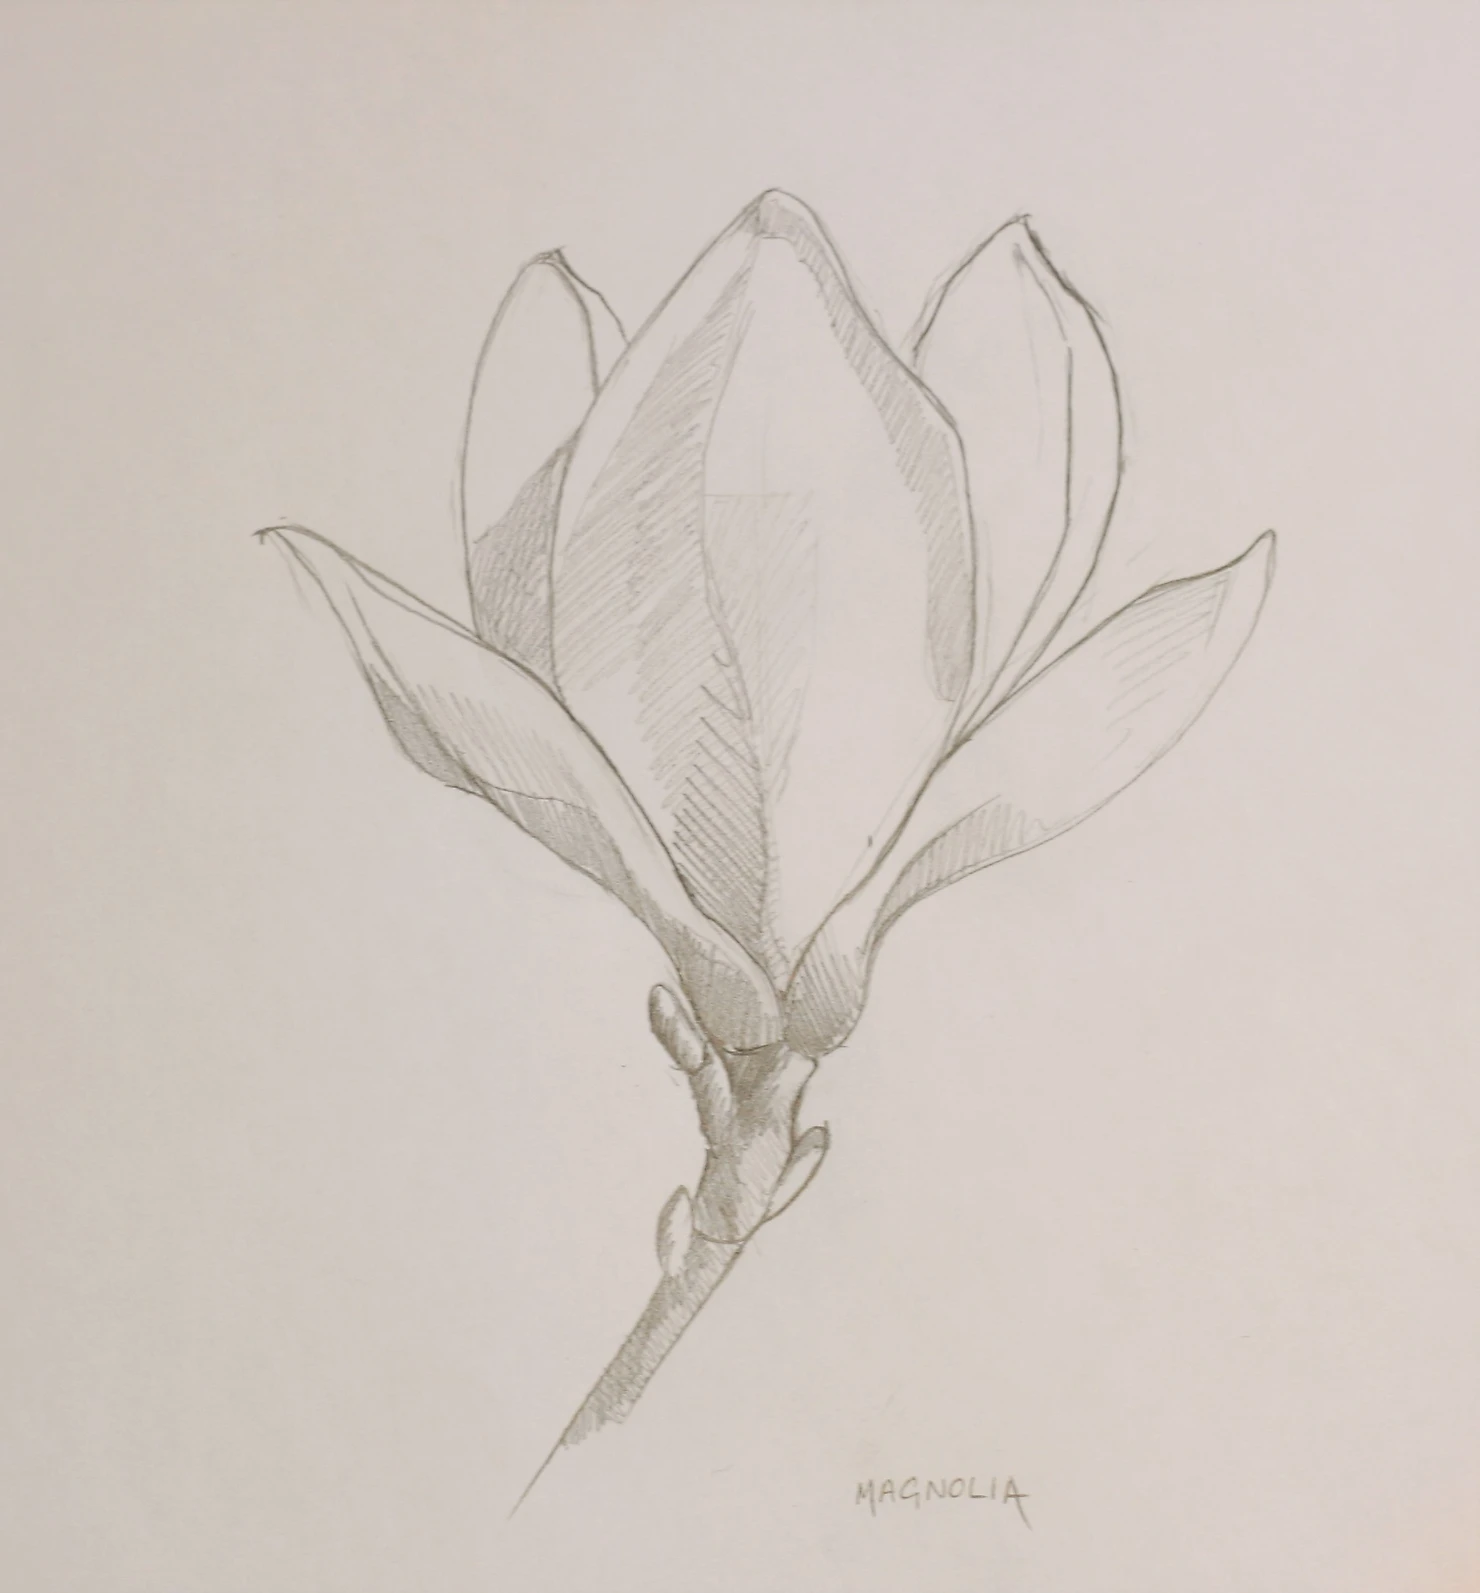
How to Draw a Magnolia Flower Step 1
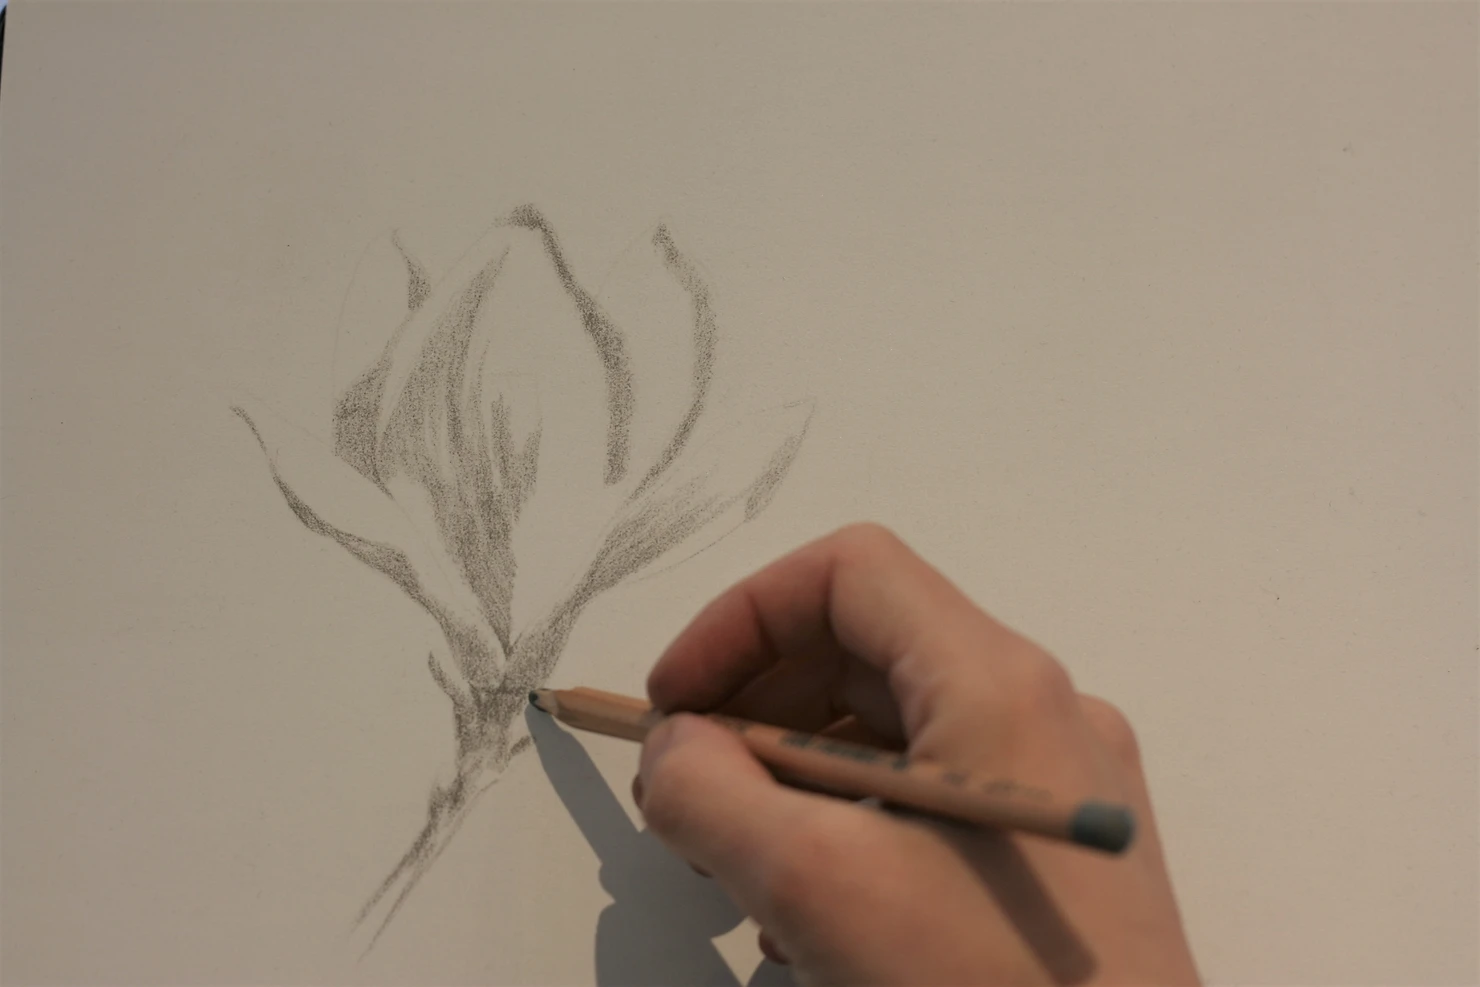
Step 2 – Shading
It’s finally time to put pastel to paper and get going. Start with the FC (Faber Castel) number 273 which is a mid-grey.
Look at your image and shade in the areas which are in shadow, you could turn your image to black and white to better see where is dark and where is midtone or light.
You also need to make sure that each line compliments that of the petal. You will see that there are lines rising up through the petals, giving them strength and structure, you need to mimic this in your shading.
Step 3
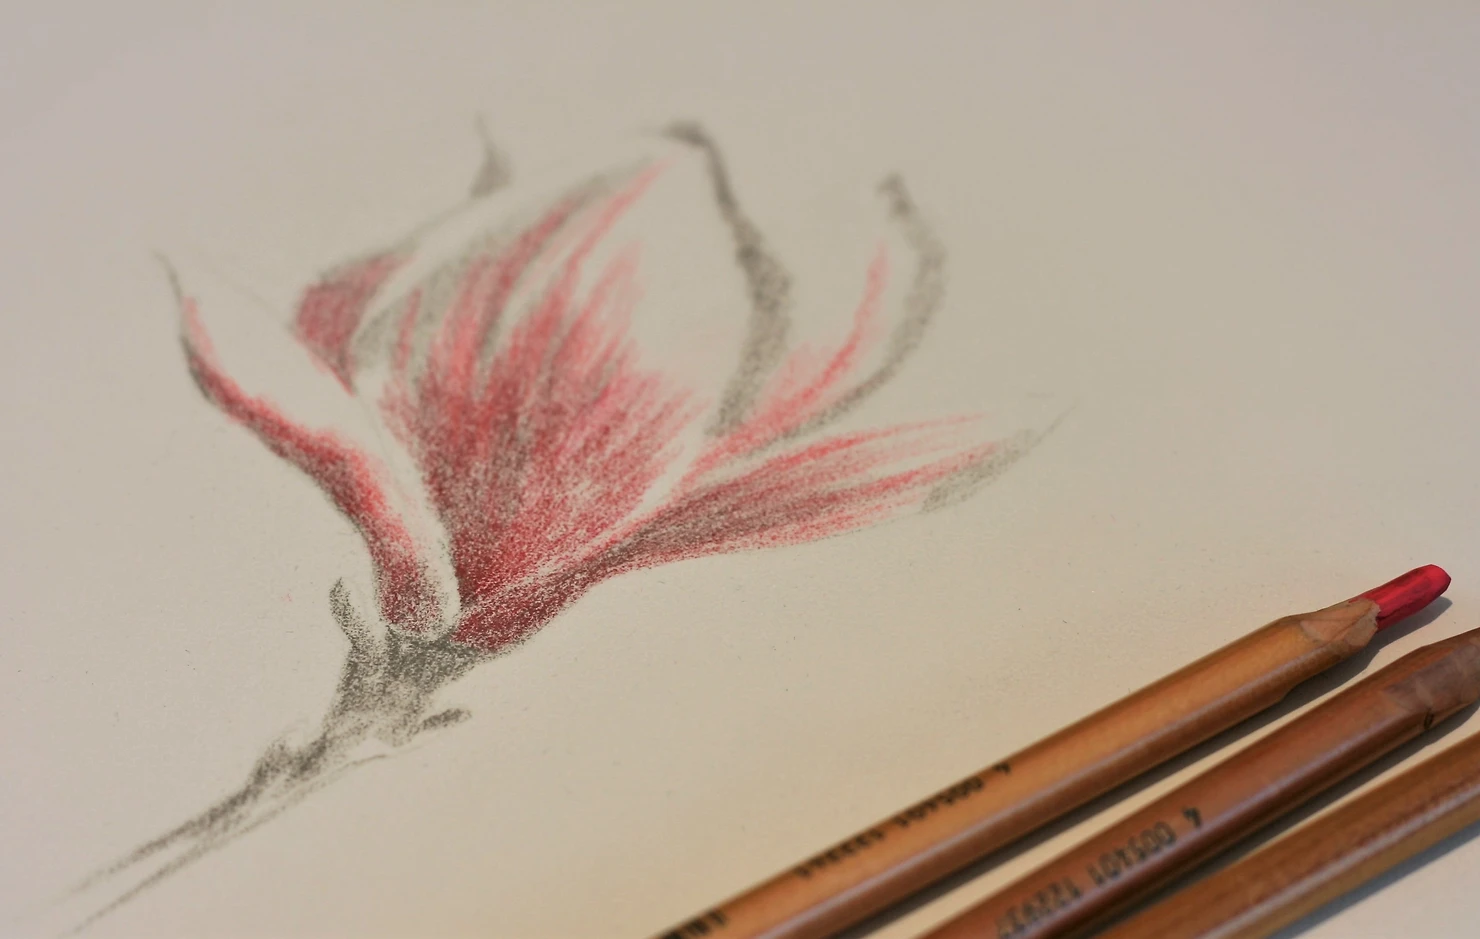
Into this deep shadow which you have created, you can now add a little colour with the FC 193. We will be adding more colour later on as well, so start off gently and get a nice even application.
Depending upon your reference image, you may have very little pink or a lot all over. On mine, there was pink in the lower half of the petals and I added this dark pink into the show only.
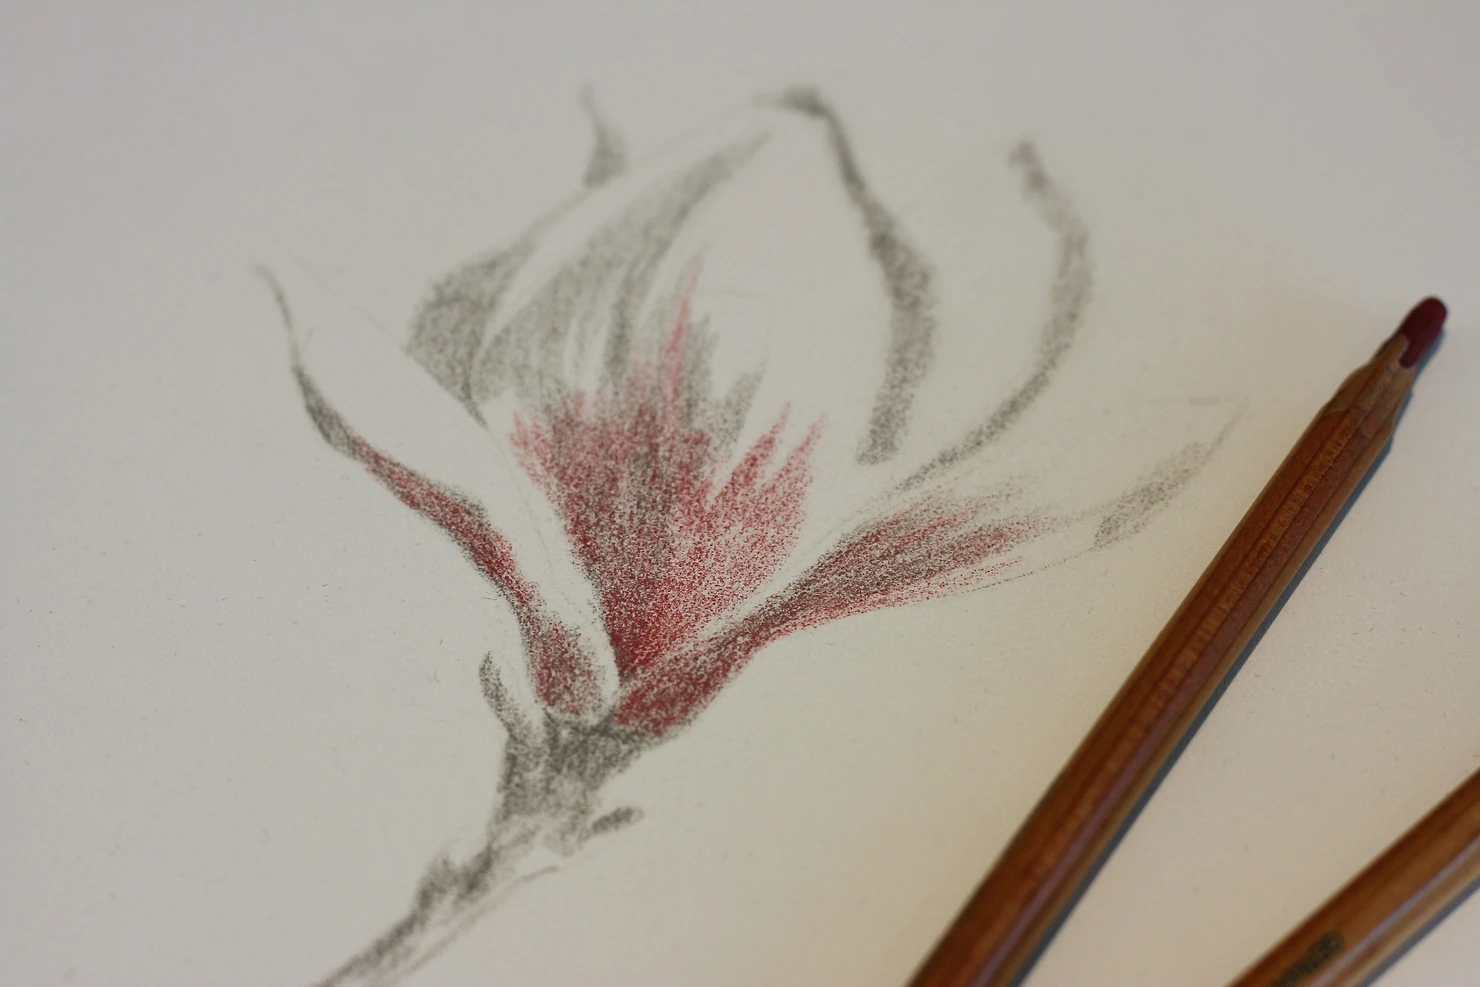
Step 4
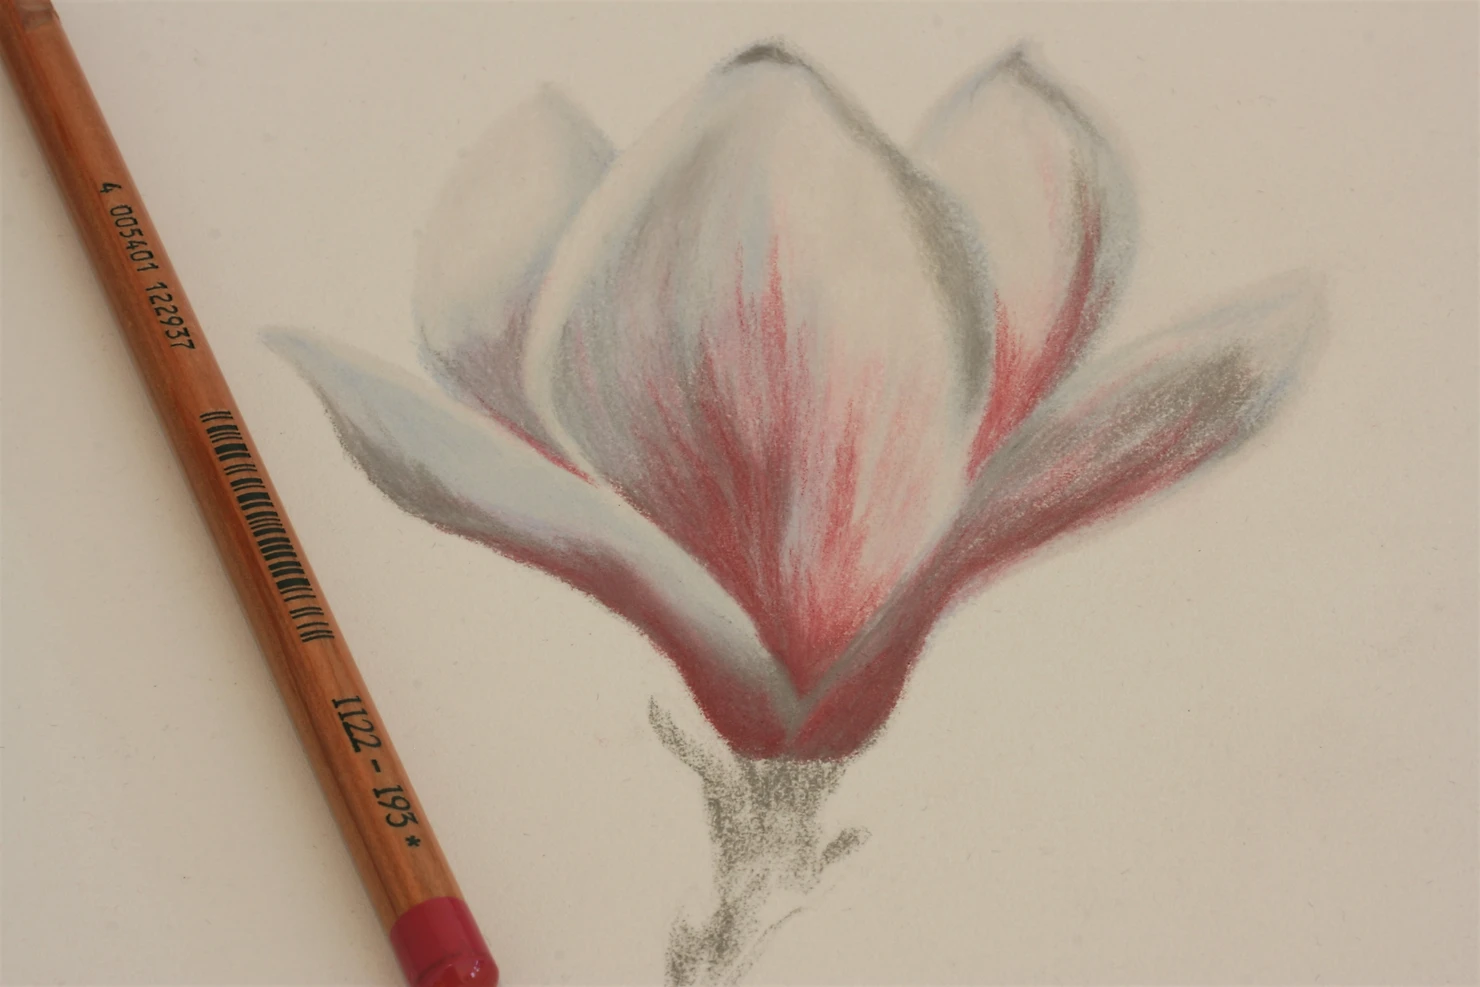
Once you have added some of the darker pink/magenta colour, you can add a little more pink pastel further up the petals with the lighter FC 124. Again, depending upon your source image, you may need to add more or less then I have but equally, you can use some artistic license!
I am not pressing too hard with the pencils at this point, you can always add more colour later on but pastel is quite hard to remove once you have put it down, even with a putty rubber.
Step 5
The next few stages might look a little odd for a while, this is fine and is all a part of constructing the tone of your painting. Tone simply means how light or dark something is, this is why it can be really helpful when you are drawing something to turn your reference into black and white so that you can properly see these relationships, you may be surprised what you see!
Using the Stabilo 722, which is a lovely blue-grey colour, shade in the darker midtones of the petals, as well as on top of the FC 273 shadows you have already drawn in. You will also go over some of the pinks with the Stabilo, so, think of this layer like a glaze: it covers all of your shadow work very lightly and brings the different parts together.
You need to work lightly so that you don’t lose all of the pastel underneath, it is also important to work in the direction of the petals as you have done with the other layers.
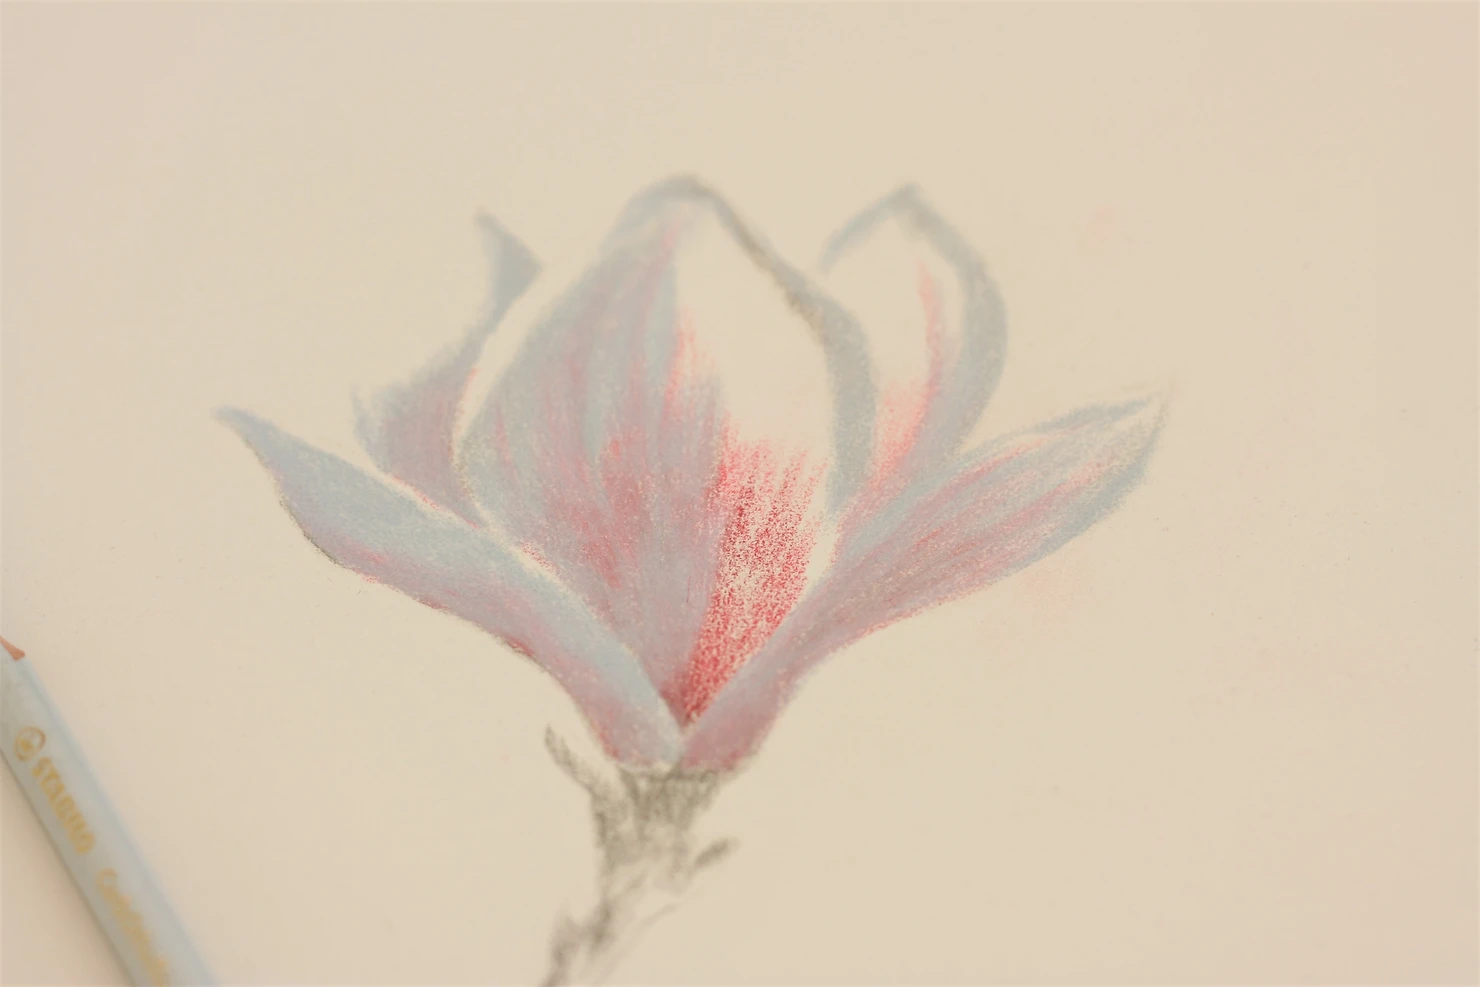
Step 6
Now we can fill in the rest of the petals, so all of the areas which are not yet covered can be drawn in. Do this using the FC 270, this will not show up very well but please lay it in, having pastel to work into is key to achieving lovely edges in your work.
You can now press fairly hard with the 270, for the edges where it meets the shadow work, try blending them together using a circular motion with the pencil, this avoids messy shading lines.
Step 7
You may now feel that your flower has lost some of its presence, it looks too pale and bled out. That is because as we have worked, we have glazed over some of our layers which have unified them nicely but also reduced our tonal range. If you carried on and left it this way, your flower would be very flat and lacklustre.
So, pick up the FC 273 again and work back into the shadows, as we did in step 2. You will have much more pastel to work into now, move gently and in the correct direction of the petal so that the marks are smooth, just like the flower.
As you will see below, this can look messy and too dark, but keep referring to your photo for guidance. If you are struggling to see how much darker you need to go, take a photo of your work and turn it to ‘mono’ or black and white, do the same with your reference and compare.
Step 8
Looking too grey? That’s alright, go ahead and add in more of the deep magenta colour, FC 193, to those new shadows. This will start to pull everything back together but you’ll need to keep stopping and see how much more to add. You don’t want to overdo the pink, and some of the shadows are very desaturated.
Desaturated simply means that they have less colour in them, for those flat and grey areas, you won’t need much pink at all. A nice way to grade the pink out into grey shadow is by tapping the edge of the pink, it will disappear into the grey.
Step 9
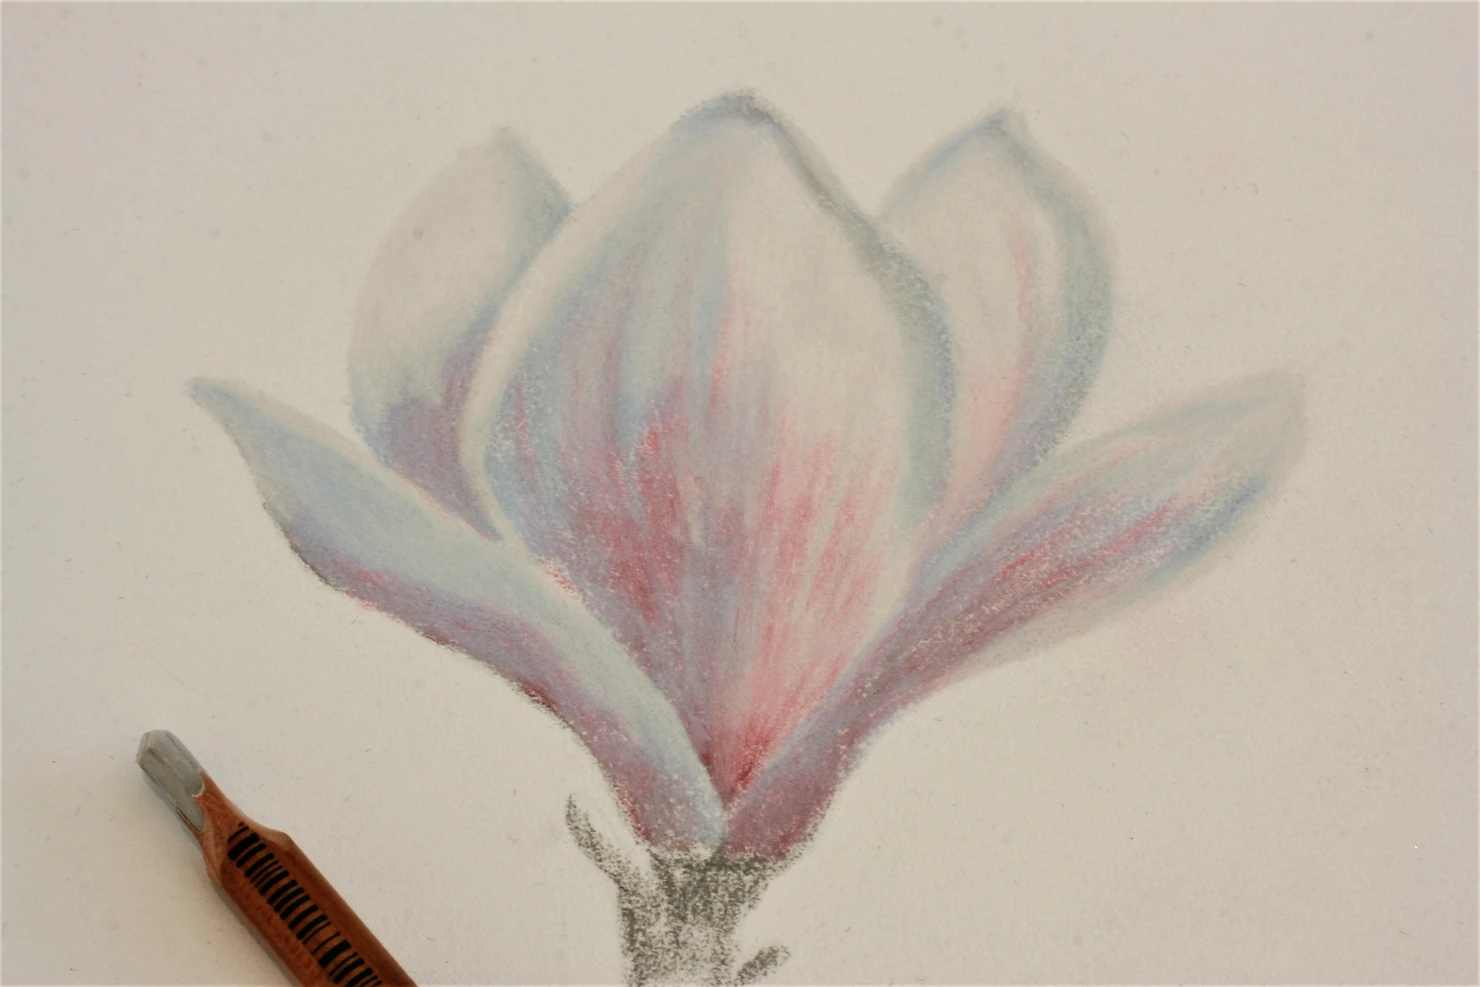
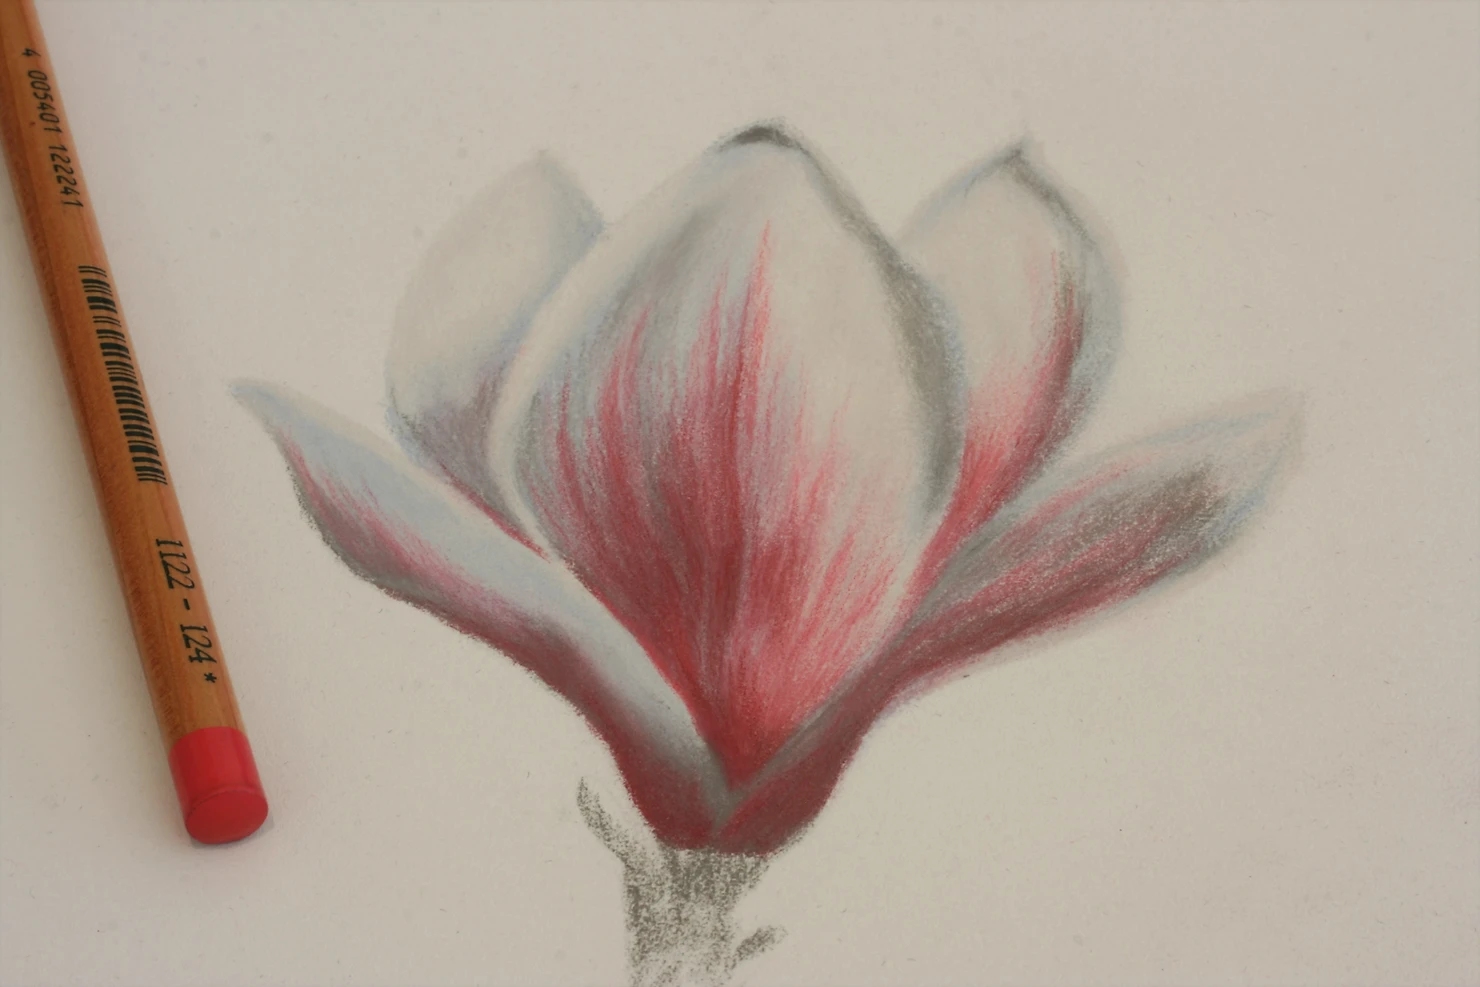
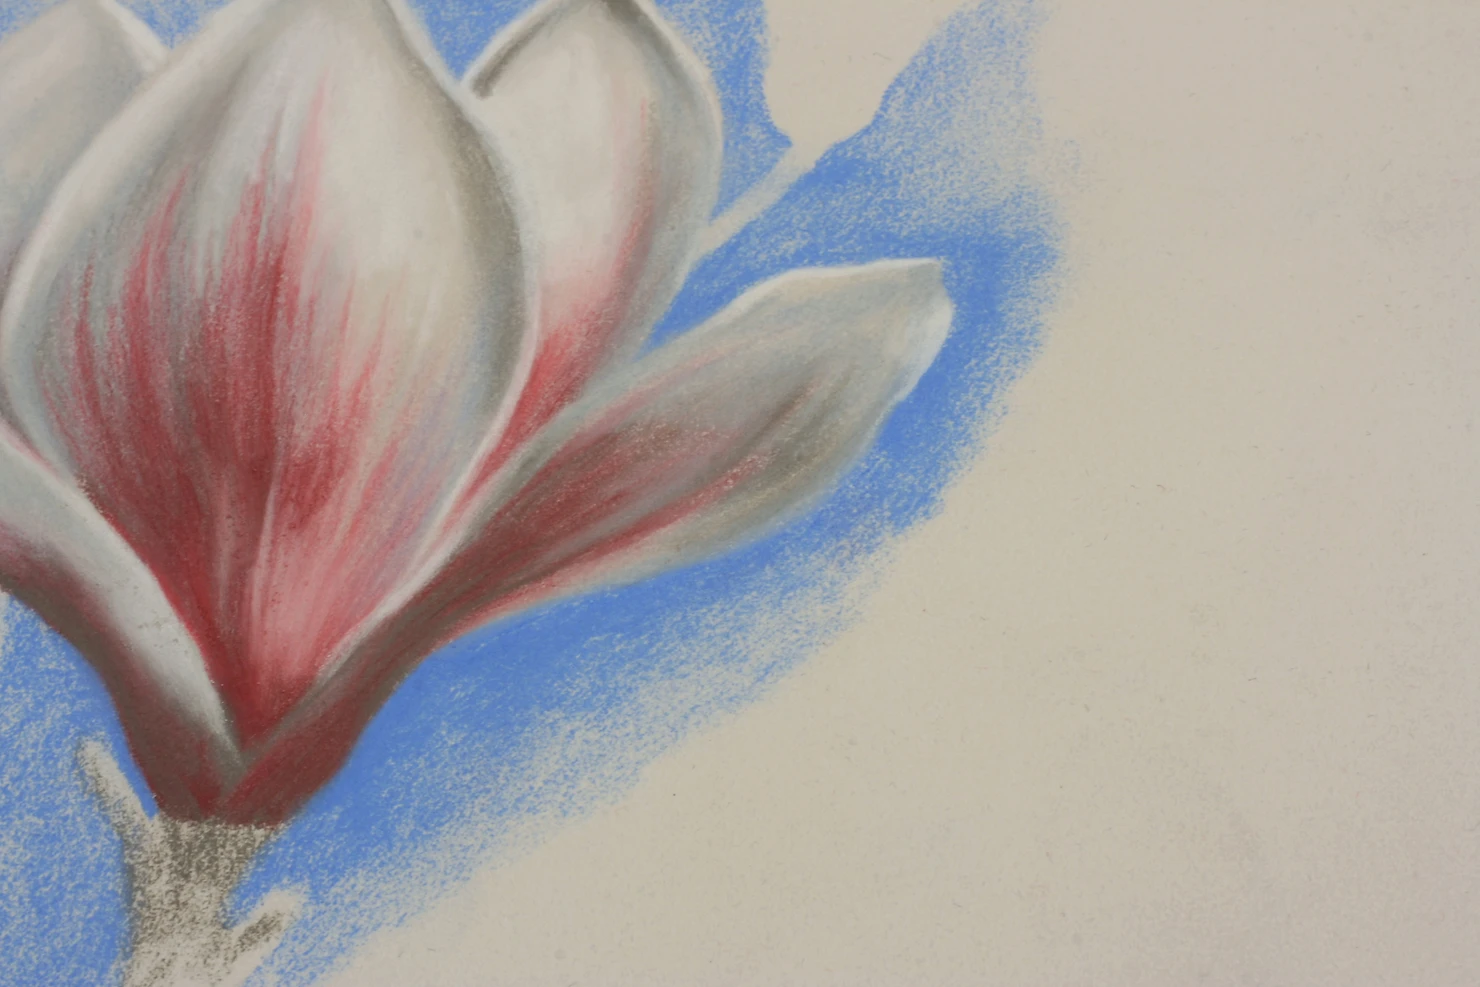
Logically, we are now going to add more of that beautiful and vibrant lighter pink, this needs to transition from the darker magenta out into the upper half of the petal.
I drew these marks with a slightly blunt pencil so that they were soft and suggested the details. Start with your pencil already moving and brush it onto the card, then sweep it off whilst still moving and keeping the pressure a constant. This should prevent you from having ‘blotches’ where you press the pencil down and then begin to move it.
This is something I have learnt to do with my pet portraits and fur, it keeps the coats of the animal nice and even without distracting marks where the pencil has pressed hard into the board. This flower is actually great pencil control practice as it takes out a lot of the detail which weighs down wildlife art and keeps the shapes relatively simple. If you can practice soft transitions from the underpainting right through to the top layers, you’ll find it much easier to draw a dog, horse or whatever other animals you want!
Step 10
This step changes your whole painting, I would also recommend having that crystal paper under your hand or else your face, top and everything else within reach are going to become a little blue!
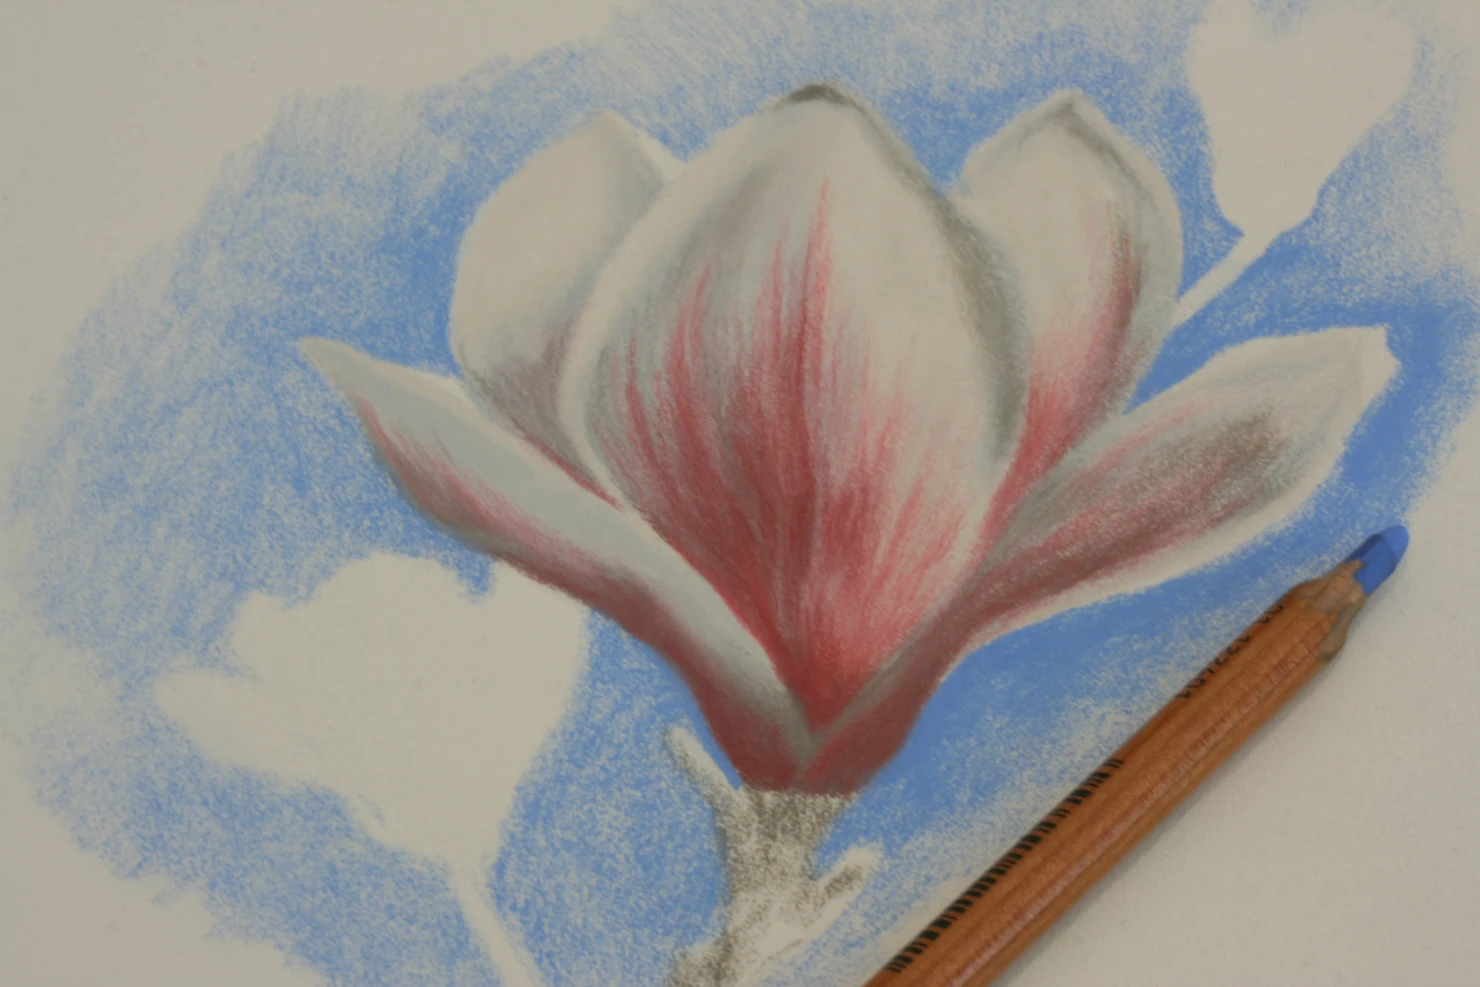
Use that wonderful FC 140 light blue to shade around your Magnolia. It is entirely up to you how much you shade in, but outlining the flower will allow the highlights to shine out much more brightly. Why is this?…
Well, it comes back to tone. The card we are working on is already very light, so, by darkening the edges the whole flower will appear to ‘pop’ out of the page much better as the lighter edges contrast against the blue. If we didn’t do this, your flower would still look a little too flat and we would struggle with some edge management later on…
Step 12
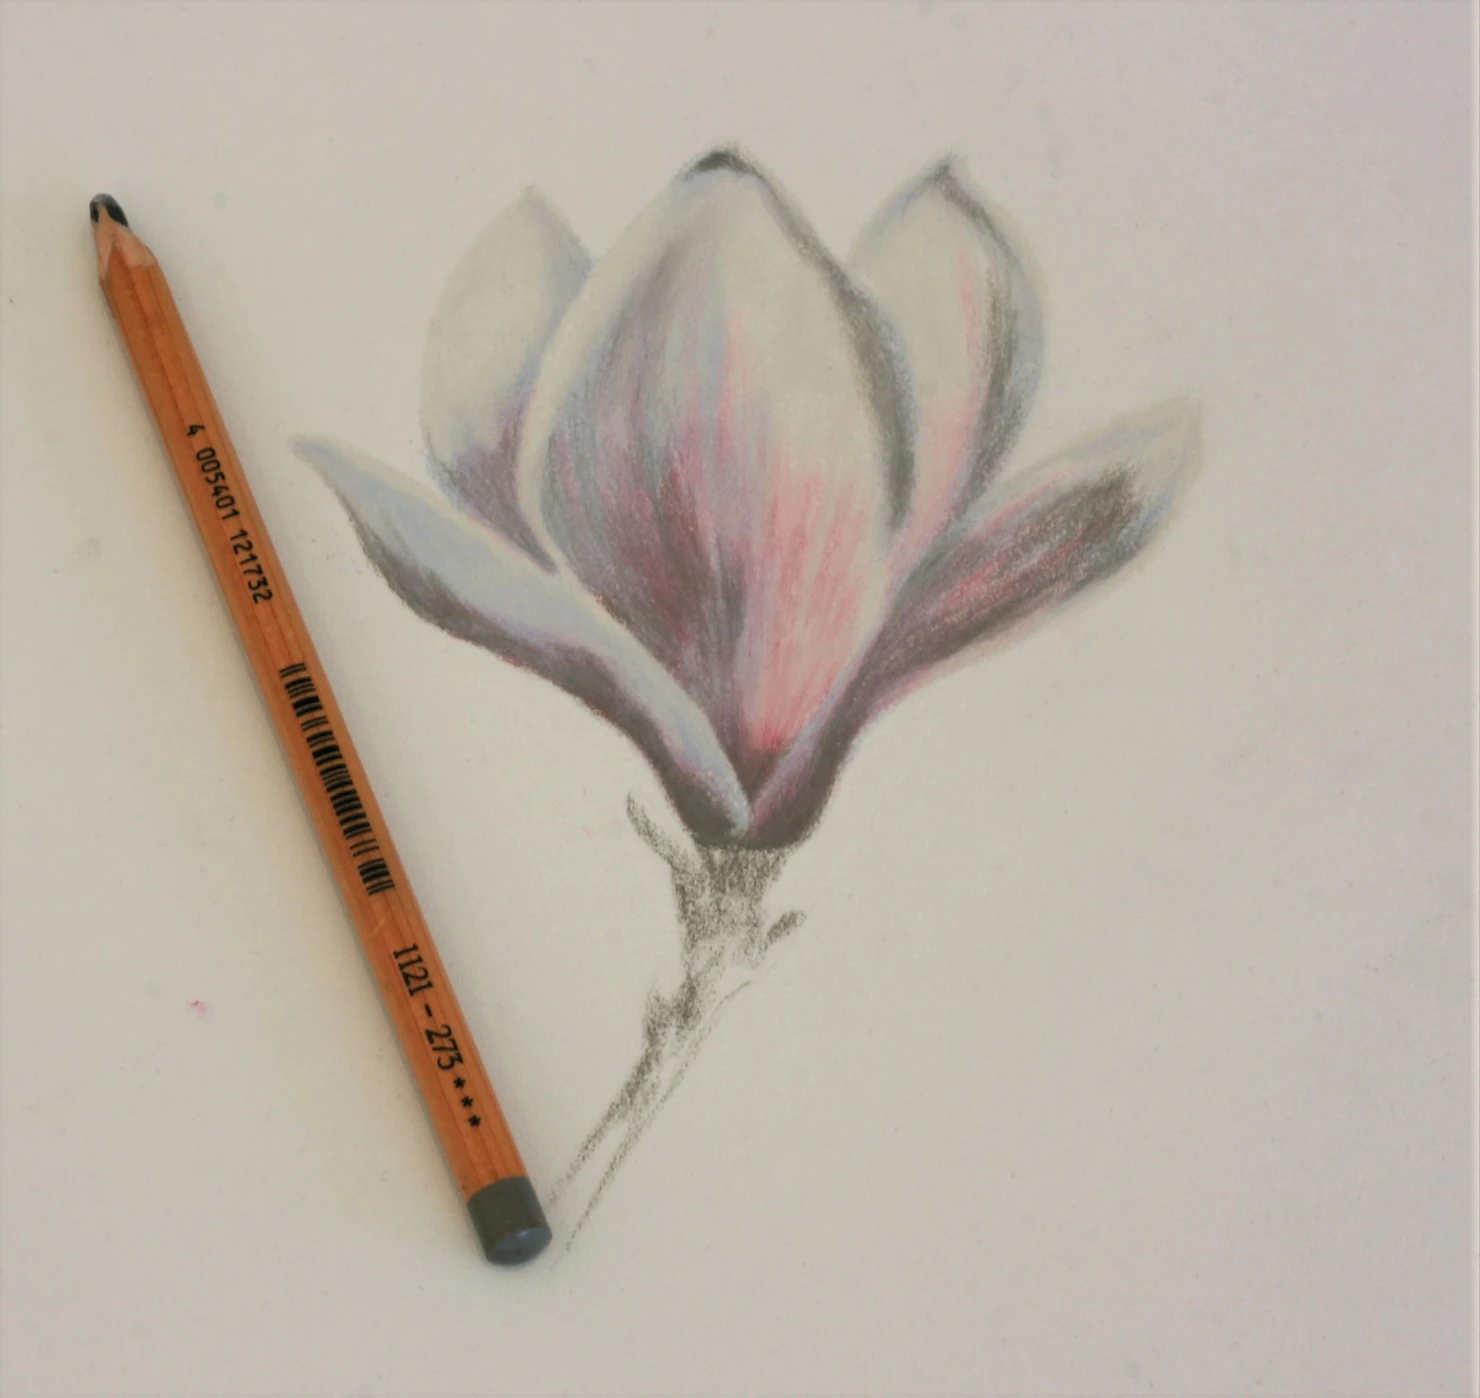
Well done if you have got this far, not many more steps to go until you can proudly show off your new piece! We are finally going to add our lightest light to the painting and really show how thick and domed the petals are.
In my art workshops which are held between Norfolk and Oxfordshire, I tend to warn people against the white pencil: it must be treated with extreme caution! As lovely as highlights are if you totally lose your head and keep adding more and more white, your light source becomes scattered and the painting will be overexposed and look off-balance. Less is more…
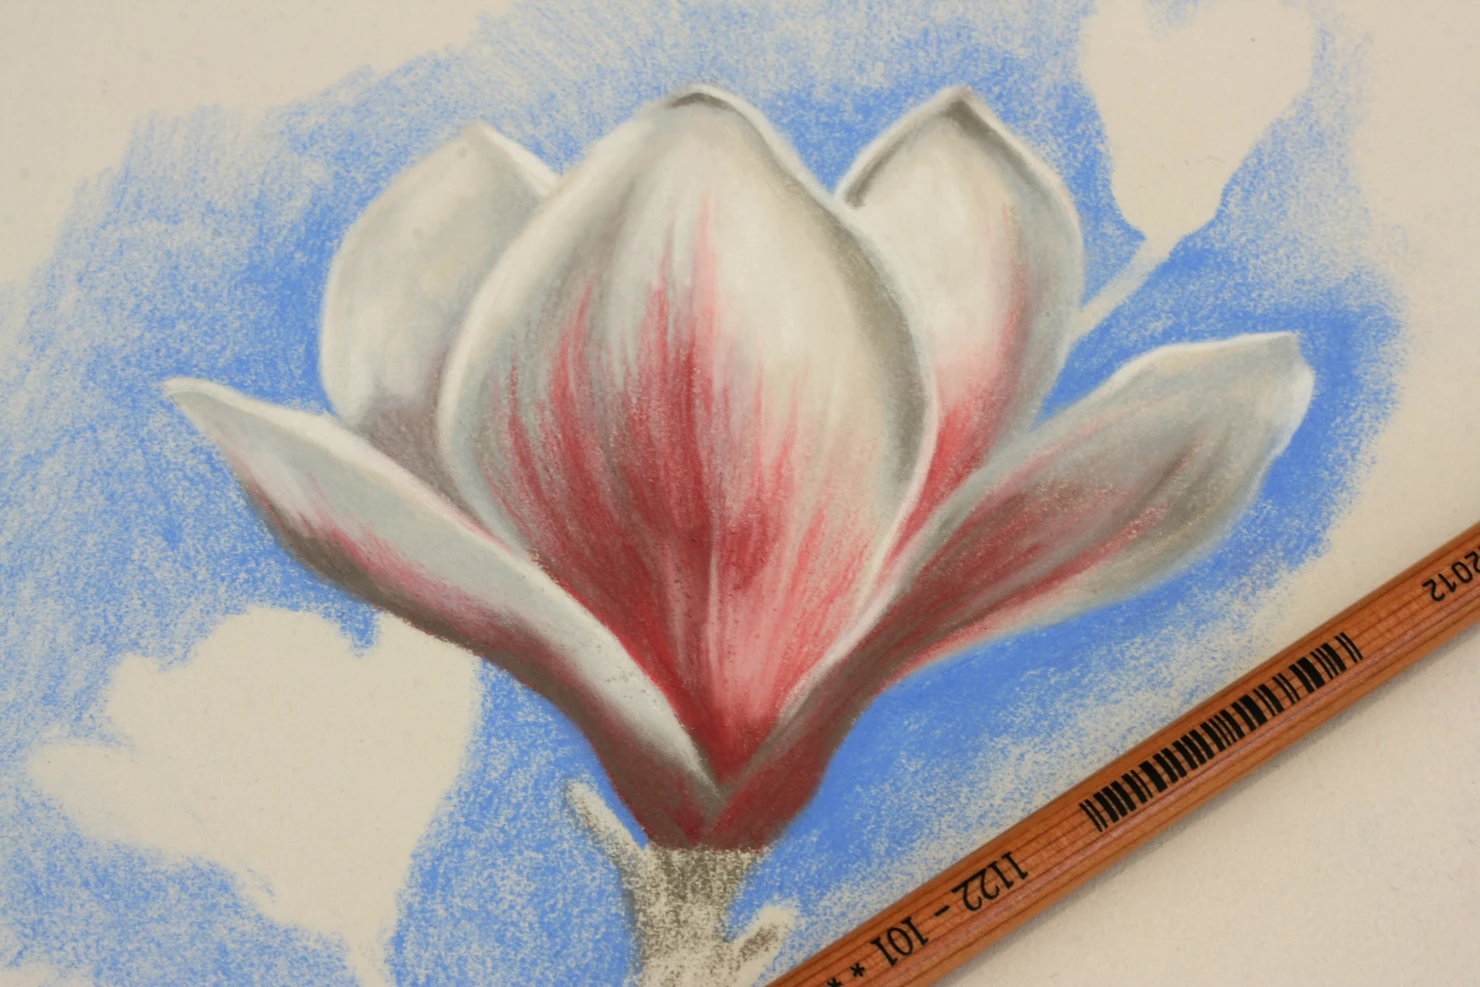
So, with that warning, take you FC 101 and begin to pick out those highlights. Again, turn your reference to black and white to better see these if you need to. I added the white to some of the edges and to the lit upper half of the petal facing us, as it’s catching a lot of light.
This flower is not shiny, the petals are a satin-type texture and so these highlights should have soft edges instead of hard and crisp. As you will already have a lot of pastel pencil down, it is easy enough to have soft edges, you can achieve it with the pencil itself or by tapping the white edges with your finger to push them back.
Step 13
Before we finish off this painting, we should address those edges. I have mentioned them throughout this tutorial, edge control in painting is critical: too many hard edges are distracting and too few don’t describe the form. It’s the Goldilocks conundrum, they need to be just right.
So, I have softened some of the external edges of the petals, those I have chosen are those which are midtone and slightly shaded. To do this, I have run the Stabilo 722 along the edge and smudged it slightly with the blue background so that it isn’t a focal point for us.
By controlling your edges, you can really show what is important in the painting and focus the eyes to those areas.
Step 14
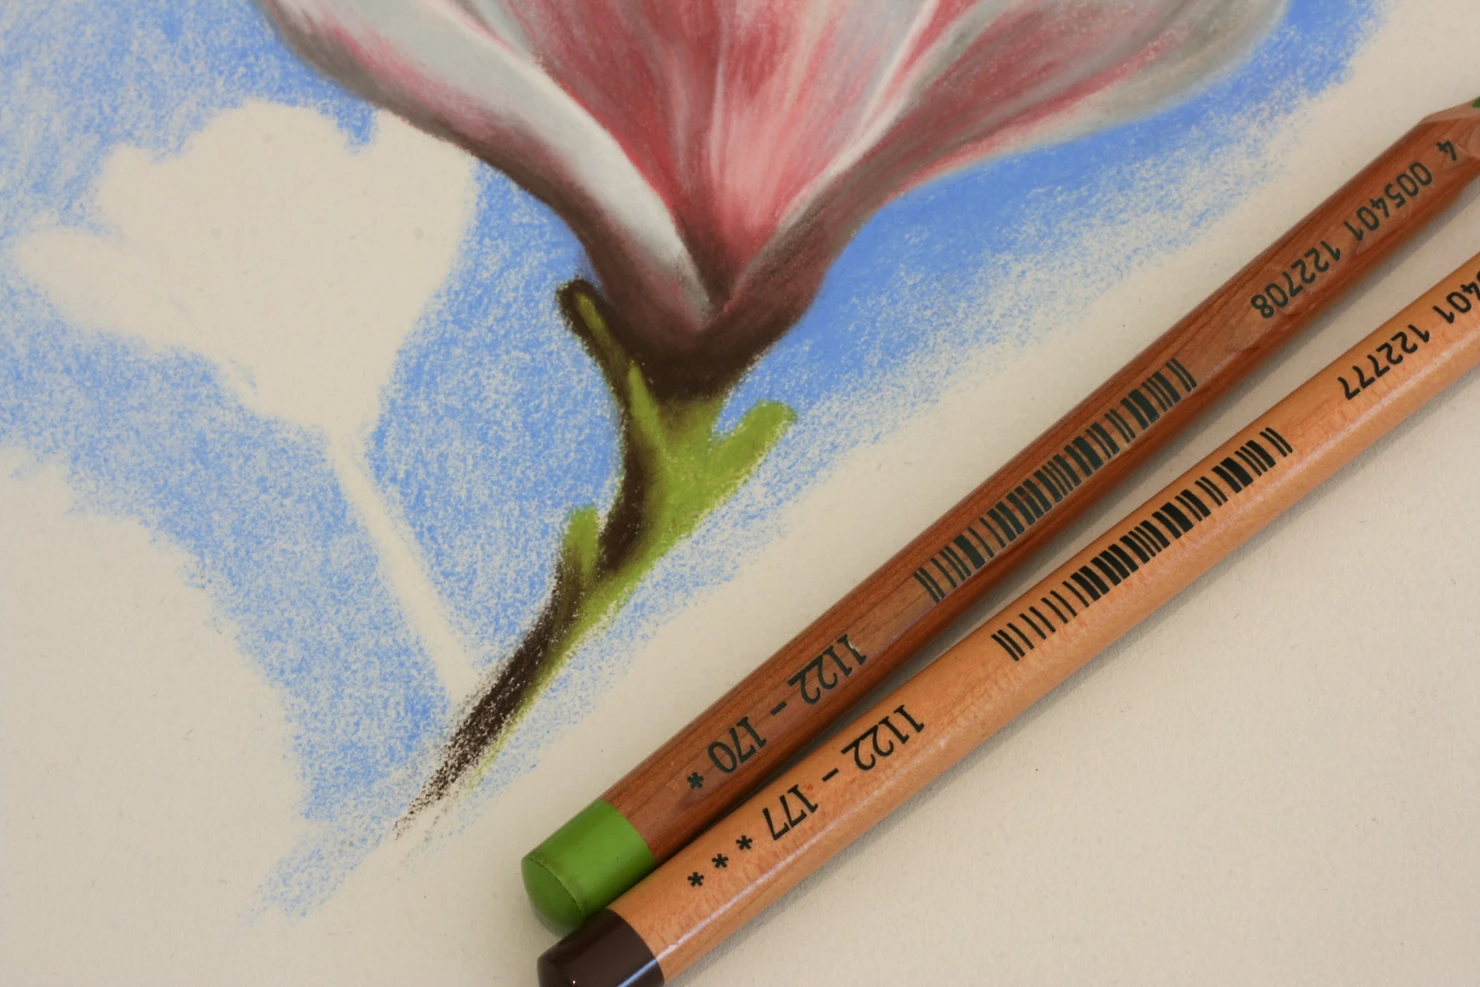
The last step, you are almost done…or ready to start tinkering with your painting until it sits just right. To finish, we need to give the flower a stem, start by colouring in the budding greens with FC 170, you can trail this into some of the brown stem as well, so we avoid that paint by numbers look and everything joins together.
Then, take the FC 177 and colour in the dark of the stem, thus:
How to Draw a Magnolia Flower Step 13
To join these two parts together and round out the stem, take the FC 182 and use this along the edges between the FC 170 and FC 177. You don’t need to press too hard to achieve this and can go back in with more green or dark brown as you need.

How to Draw a Magnolia Flower Step 13
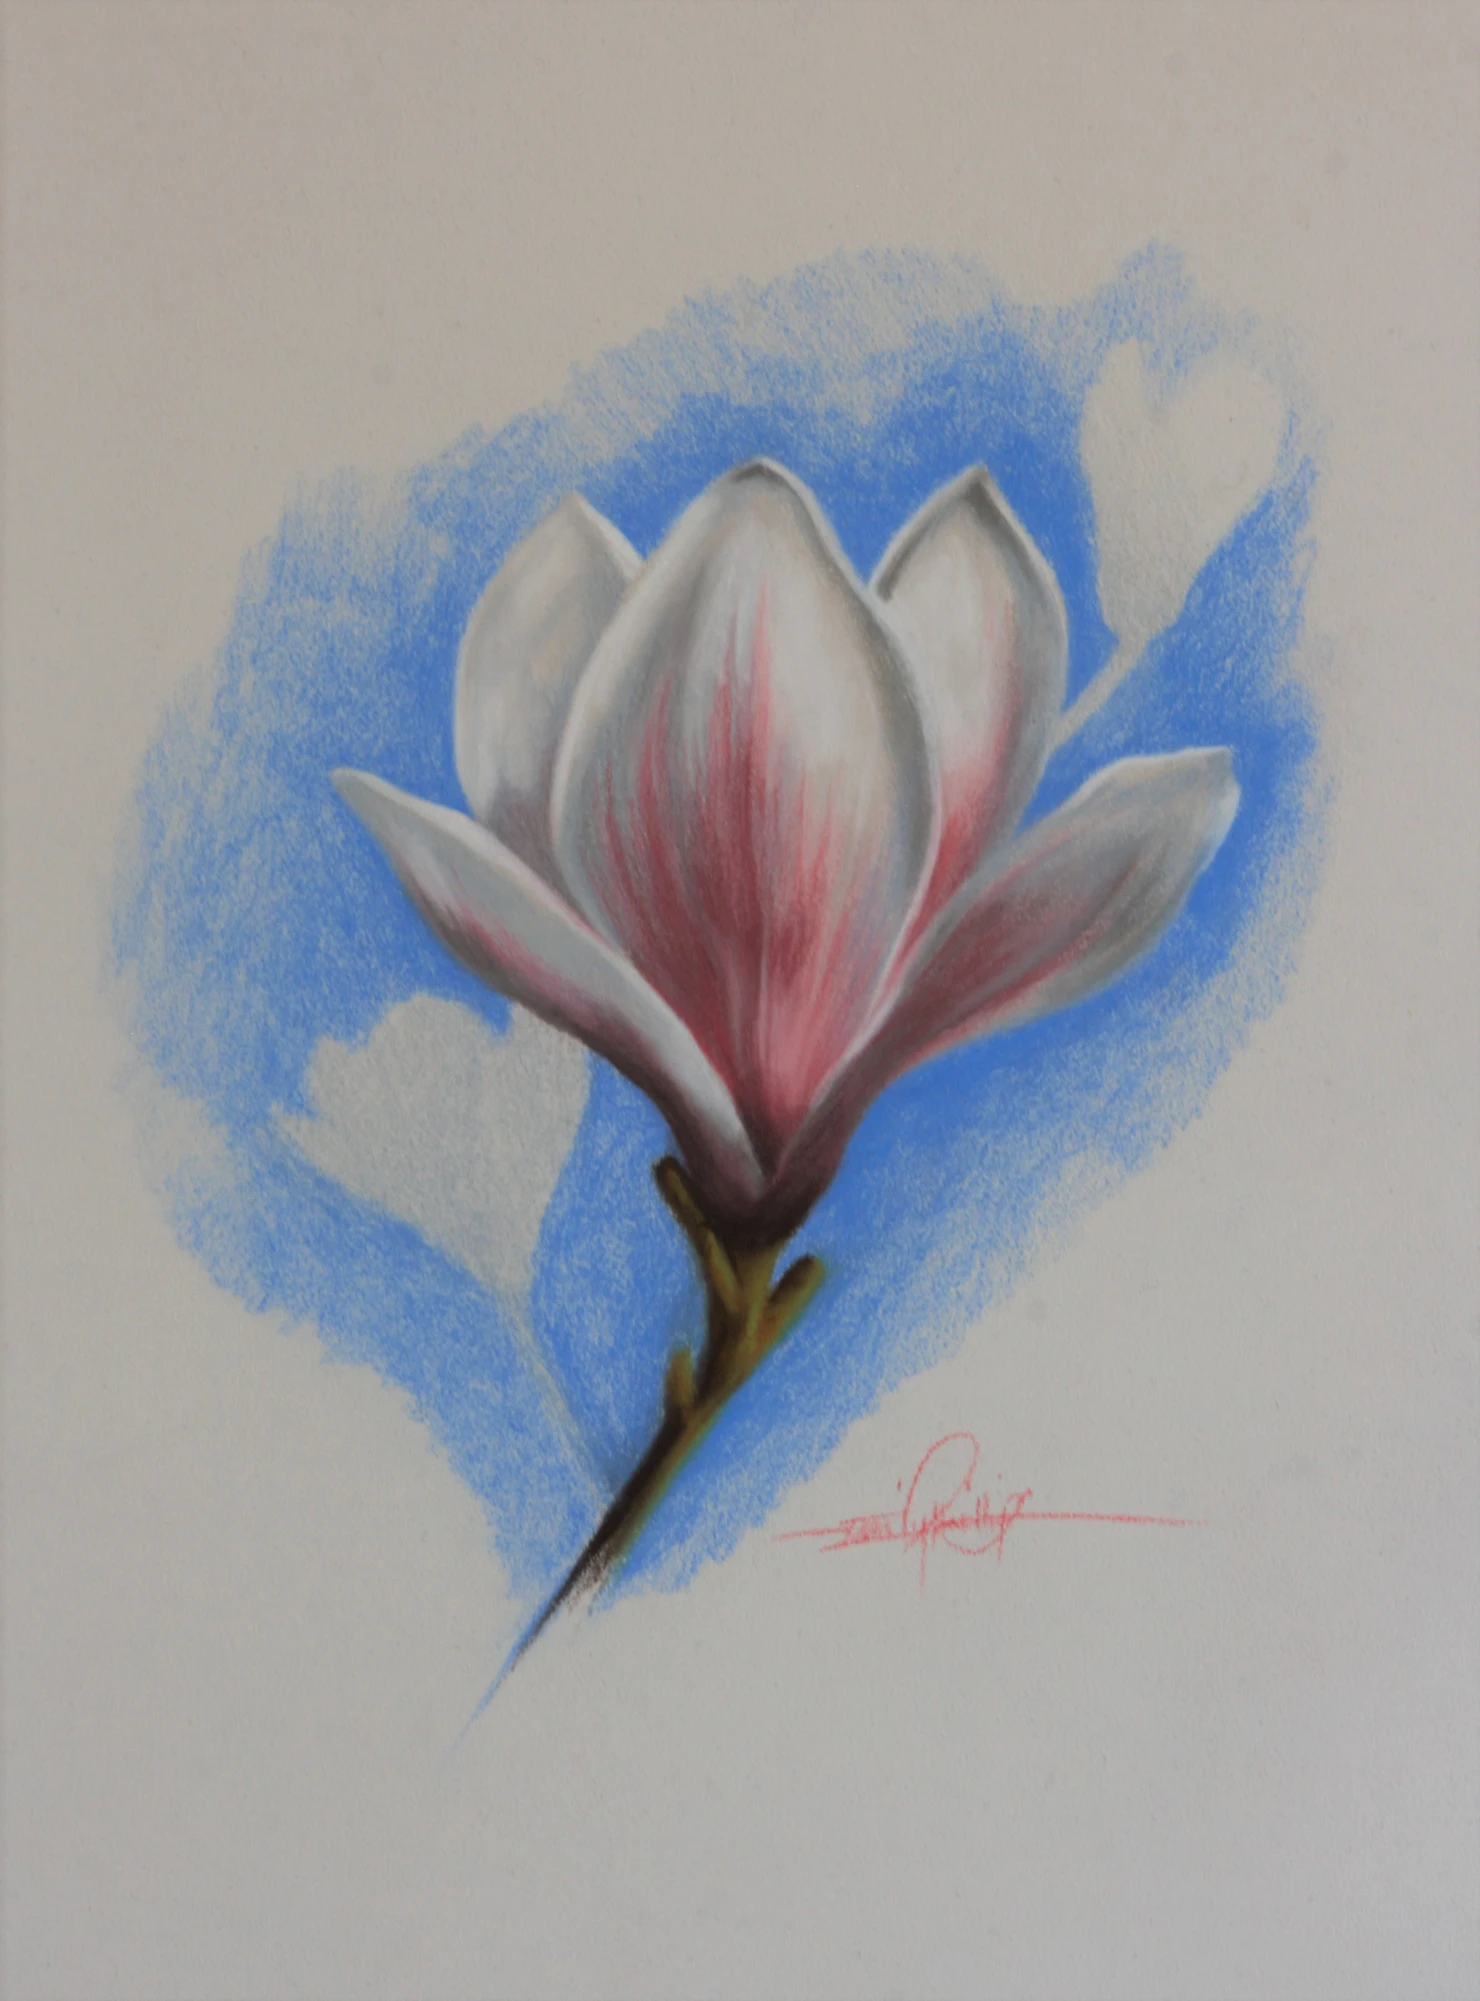
Congratulations, you’re done! You can use this method to draw plenty more Magnolia flowers, you could draw yourself an arrangement if you wanted to.
I hope you’ve enjoyed this free online art tutorial, do leave comments below as I’d love to know how you found it or what you’d like to see on the blog next. Also, a big thanks to Angie at Paper Story who has put together a wonderful deal on your art pencils, leave her a review if you have used her shop as I know she appreciates it.
So, until next time, happy drawing, stay safe, stay well and keep happy xx
Stuck for where to begin?
Start with 4 free project outlines, ready to begin in pastel pencils straight away!
Keep your pastel pencil knowledge up to date!
Stay inspired and keep your pencil moving with inspiration and updates.
Don't worry, your information will not be shared.
We hate SPAM. We will never sell your information, for any reason.
