
Your dream art studio in 5 quick steps
Jun 05, 2024
Creating your art studio 101
Let’s be clear, I’m not going to show you how to create a double height ceiling and north facing windows in your south-facing kitchen. I’m not even going to get you to touch the DIY tool box, actually. You may be surprised to find out that I don’t have anything close to the classic art studio, even though I’m a ‘professional’.
Instead, I have a kitchen/living room that faces south and only has south-facing windows. I don’t have a room just for me and my mess. Neither is there the right place for everything I need, in fact, it’s like Tetrix at times. But you know what? It doesn’t matter! If you love art as much as I do, you’ll know you don’t need that fancy set-up.
However, you do need a few things and I bet nearly everyone can create this at home art studio!
Number 1: Bedroom, Kitchen...Bathroom?...
I began on the world’s smallest desk in my student bedroom four years ago, believe me, it was small. But that was fine. I had a tea tray and kept all of my pencils on that so they didn’t roll around…I seem to remember that went on the floor because the table really was that small!
So be reassured; the kitchen table is positively luxurious compared to my beginnings. So this is your first challenge, you need to find a space you can use. This doesn’t need to be permanent, I will show you ways to get things out and away quickly.
Spare room art studio heaven
If you have more space though, take a look at the spare room, if you have one. How often is it really used? Probably not once a week and if you think you’ll be using it more than a guest, take it over! You can still have it as your guest room when you need it, but in the meantime claim it back.
Have you got a big garage? That can be a good space as well as unused summer houses in the garden. Those do depend on heating, but for some it isn’t a problem.
No spare room or kitchen table?
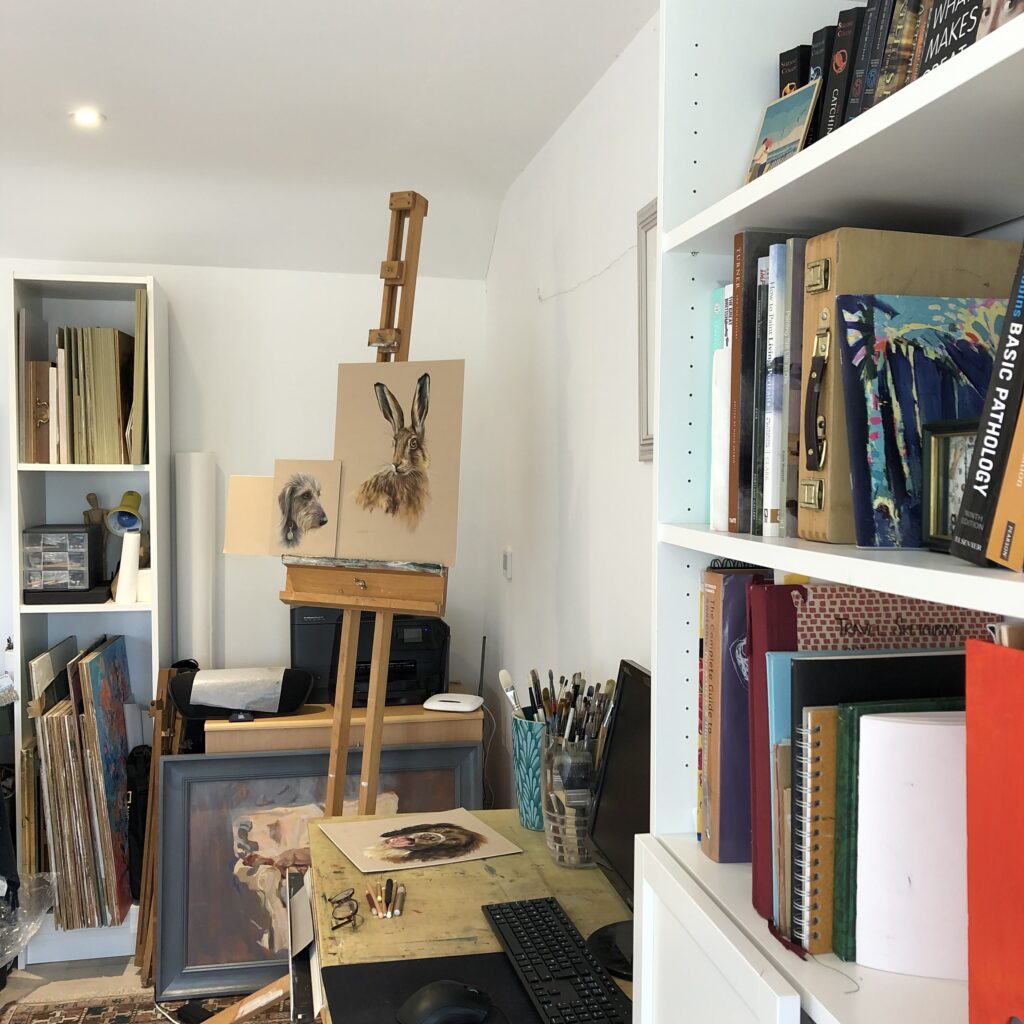
If you’ve been round the whole house and, like me, have no spare room, no unused summer house or even a kitchen table, (we really don’t have one!), then you can do what I have done. I have a drawing table at the back of the kitchen/living behind the sofa – glamorous I know.
I got my drawing desk second hand for peanuts but I know not everyone will have room for these. You could just as easily use a desk or even a folding picnic table if you’re tight on space. That way you can take up space when you want to draw and fold the table away again after.
Number 2: table, easel or both?
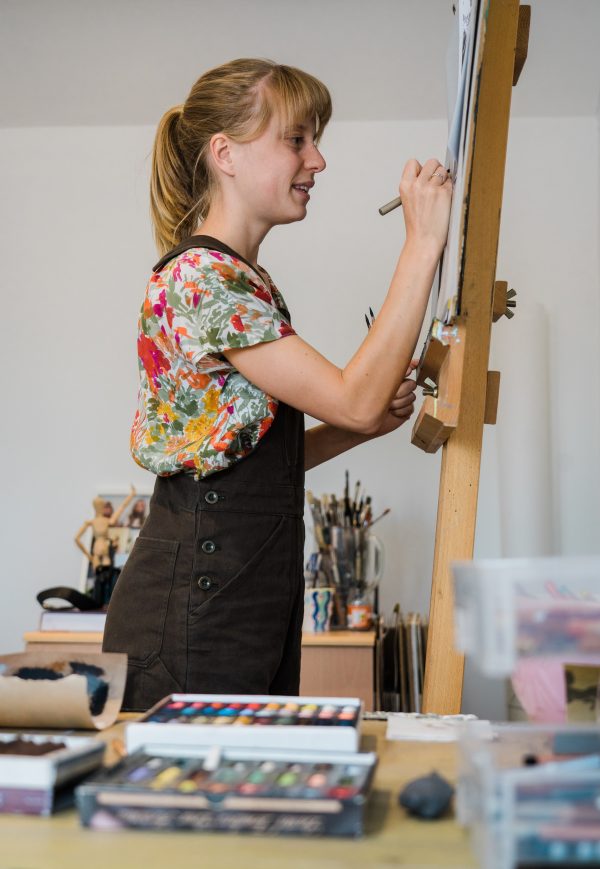
When you first start drawing, a lot of people think they need the holy-grail 45 degree angle. You don’t. Desk easels are great for painting but can cause a lot of wrist ache if you’re drawing. The most important thing is to be very comfy when you’re drawing!
If you are working on a table, make sure you are at the right height and not twisting your back and neck. After a few hours, this won’t be pleasant at all! I find it quite hard to draw sitting down for a long time and actually prefer to stand.
Field easel in the house
This can be a great option for those short on space, too! A basic field easel is fine for this, I recently upgraded to a studio easel which is more sturdy but dearer. They also don’t fold up very well so you need a dedicated space for it.
If you get a field easel, then get a board to rest your work on top of. I find standing up to be better for my back and neck, but again play around until it’s at the correct height for you!
Number 3: let’s light it up
So, you have a space, be it the kitchen table or your siblings old room and have decided what to draw on, too. Next we should think about being able to see what you’re up to! As I said at the start, we are unlikely to have high north-facing windows and I wouldn’t advise a sledge hammer to fix this either.
This is a short and simple section really, when it’s possible to work in natural light. Maybe you can shift the table when you draw to be next to a window? If your room isn’t light enough for this or you’re drawing later on in the day then we will turn to bulbs.
The best option is to get a daylight bulb for your art studio. Now, these can get very pricey but you really don’t need to go mad. I purchased one for around £8 from a DIY shop only this year. I swap out the main bulb and use this when I’m drawing else where, (our home has spot lights so they’re perfect luckily).
You can just as easily put this bulb into a lamp, just be sure not to over-light your desk. This will give you a headache after a time and also make it hard to properly see what you’re doing in terms of colour.
Number 4: Quick to move
This has, has, has to be a part of your art studio set up. If you are working in a space which isn’t yours all of the time and is multi-purpose, you need it to be easy to use! This section runs over into storage a little but it’s worth considering before you choose your storage options.
Clear away that mess!…Or, avoid mess in the first place
To start with, let’s look at the messy side of things that can be annoying to wipe up every time you want to draw. So, for the messy pastel dust produced when you’re sharpening your pencils, get yourself a tea tray. Yup, high-end tech all the way here!
A tea tray with a lip around the edge will keep all of that dust nice and contained for you. I also lay my sanding paper on a piece of kitchen towel and fold another square over it when I pop things away. This just stops excess dust ‘poofing’ off into the room.
As for the wood sharpening’s, I use a small plastic box with a lid which the craft knife can fit into…sometimes I even clean it out! This is another item you can fit onto the tea tray.
Pencils
This runs over into storage yet again, so I’ll just make a few brief points here which are important for speed. You must make sure that however you decide to store your pencils they are really safe. Often being quick to get things out and back will lead to pencils rolling around and breaking as they hit the floor.
So think about saving bubble wrap and using this to cushion your pencils. Also, go for function over form every time. As much as something might look the part it might not protect your materials well at all. You need to make sure they are kept secure as one drop on the floor often means a ‘dead’ pencil.
Pencils are often the material that I do leave out. I think they look fine in pots or the like, arranged by colour and sat on a desk. So consider moving them as little as possible to help keep them safe.
Instant drawing board
We have already covered this, so I’ll be quick, but remember that you need something to draw on or at. This is where I would recommend a field easel for those short on space. These pack away into almost nothing and are quick to get out, too.
Also, you can leave your work ready to go by using low-tack artist tape. It’s really amazing stuff and doesn’t damage your board if you leave it on for a long time. So, you could tape your drawing to your drawing board, (I use a piece of mdf slotted onto my easel), with this tape and leave it on until the drawing is finished. You must make sure that you cover your drawing with crystal paper before you pop it away though.
Number 5: Storage
Finished Works
When a piece is completed and you have proudly shown it to your family, friends, neighbours and everyone in the staff room at work, it’s time to get it away. Between finishing and framing, we need to make sure your work is kept in perfect condition, luckily, it’s not too hard.
The pastelmat I use to draw on, find out about it below, holds onto your drawing very well and reduces the possibility of smudges just by its composition. That said, it’s best not to lay things on top of your work or leave it out. You should cover the piece with some crystal paper, which is amazing to use whilst you’re drawing so that you can rest your hand, too.
When you have tacked some crystal paper on, it’s time to find the safe spot. You could use an art binder, these are like large zip-close folders for flat works. Or, for large pieces, you can store them in a wardrobe. Wardrobes used to store long dress or coats in are great as the garments gently hold the painting upright. I also store some framed works like this. It’s a low traffic space as well, so it’s pretty perfect.
Wherever you choose, try to make sure the work is kept relatively flat and without heavy items on top of it.
Pencils
You have so many options that it’s hard to decide how you’d like to keep these safe. The budget option is to use cups, empty jars or cleaned cans. If you do this, make sure that you put a little padding such as tissue or bubble wrap in the bottom. This helps to keep your pencils safe for you.
I usually organise my pencils by light grey, dark grey, light browns (and yellows), dark browns. Then I have a bigger pot for all of the ‘fun’ colours which aren’t used too much. This means you need four small cups and one larger. Again, these can be kept out of the way until you need them. It also saves all that faffing trying to get the pencils in the right slots of the tins they came in.
Another option is to use a mini set of draws or a make-up organiser. They’re easy to get hold of and even easier to put away. Just make sure the draws are long enough for the unsharpened pencils before you buy one. Once again, lining these trays with some padding isn’t a bad idea, either.
We could go on forever about pencil storage options and could get fancy. However, this is an instant home studio set up so my last recommendation is to use old jiffy bags. I actually use these instead of pencil cases as they really protect my pencils and I hold them tight with an elastic band if needed. It’s a good way to reuse packaging and will protect your pencils nicely – they don’t exactly take up much space either!
And Breathe! …Then start making your art studio….
Ok, so there’s a few things to chew over and perhaps get started on, too. Don’t try to do everything all in one go, but think it over. See what you already have for your art studio, you’ll be surprised how much you can utilise. Repurposing is all part of being a creative and one of the ways to make this task a bit more fun!
I’d love to see what you come up with, do tag me on Instagram using the handle @Emilyrosewildlifeart
Until next time, happy drawing x
Stuck for where to begin?
Start with 4 free project outlines, ready to begin in pastel pencils straight away!
Keep your pastel pencil knowledge up to date!
Stay inspired and keep your pencil moving with inspiration and updates.
Don't worry, your information will not be shared.
We hate SPAM. We will never sell your information, for any reason.
